Don’t understand how to operate your brand new Breville appliance?
Going through a handbook page by page can be very tedious.
But don’t worry about that; that’s not something that’s required of you.
Today, I’ll provide you a condensed version of the instruction manual for using the Breville espresso machine.
Let’s not waste any time and get started.
The Step-by-Step Guide to Using Your Breville Espresso Machine
Let’s go over everything you need to know in order to use a Breville espresso machine in the correct manner.
Setting Up
Even though it is pre-assembled when you buy it, the new Breville coffee machine requires some additional configuration before it can be used.
The first thing that has to be done is to thoroughly clean all of the machine’s detachable components.
Despite the fact that your brand new espresso machine was definitely never used before, there is most likely some dust and debris that has accumulated on it. When it comes to hygiene, you can never put in too much effort, can you?
After you have finished cleaning, you should replace any detachable components in the appropriate locations.
Completely fill the water tank up to the maximum line that has been provided. Then, position a larger container with a capacity of at least 17 ounces underneath the portafilter and steam wand so that the water from the purifying brew can be collected in it.
Finally, before beginning the cycle, make sure that everything is in the correct position. To begin the rinsing process, press the button labeled “1 Cup.”
The Initial Distillation
Okay, now that we’ve finished cleaning everything thoroughly, it’s time to brew some coffee!
Grinding
In the event that the Breville appliance you own already comes equipped with a grinder, we will begin there.
To begin, you will need to decide what size of grind you want the coffee beans to be ground into.
It’s possible that you have a wider range of grinding sizes at your disposal, but the fine grind is what we’re after here. Adjust the dial on your grinder so that it is halfway between the middle setting and the maximum number.
When you are finished grinding the coffee, you should examine the particles to see how big they are. They should be ground to a consistency that is somewhat finer than table salt. If the finished product has a texture that is too coarse, you should modify the grind size for the next batch.
Crush the Amount
What is the exact quantity of coffee that needs to be ground up?
Coffee grounds weighing between 8 and 10 grams should be used for a single shot of espresso. Now, turn the knob on the Breville to the 3 o’clock position in order to set the desired quantity.
If it turns out that this is not the proper amount, you can tweak it for a future brew using the same method.
You might question how we are going to verify it.
For that, we will need a scale, specifically one with three digits that may be used in the kitchen or for coffee. If you don’t have either of those, you can use scoops to get a close approximation of the amount.
First things first, take a weight reading of the actual portafilter. After that, once you’ve finished grinding, measure it once it’s been loaded with coffee. Simply deduct the two sets of numbers to obtain the required quantity of coffee.
Coffee Being Stirred
The grinding of the coffee will begin once you have inserted the portafilter into the machine.
Once everything is finished, remove the portafilter.
Put the coffee grinds into the portafilter by pushing them in with your finger and only lightly packing them down. You don’t want to come across as either overly soft or overly forceful. In an ideal situation, you should strive to have the surface as flat as possible at the level of the portafilter edges.
Naturally, the best way to accomplish this is by pressing the grounds of the coffee with a tamper. If you don’t already have this product, you should definitely consider purchasing it because it will make your responsibilities lot simpler.
Brewing
Now we get to the enjoyable part.
You need to hit the 1-Cup button before you actually put the portafilter in the machine. This will initiate a brief brewing cycle that will warm up the machine for the actual brewing process.
When that is finished, you can proceed to the next step, which is to replace the portafilter and then lock it into place.
To begin the brewing process, press the button.
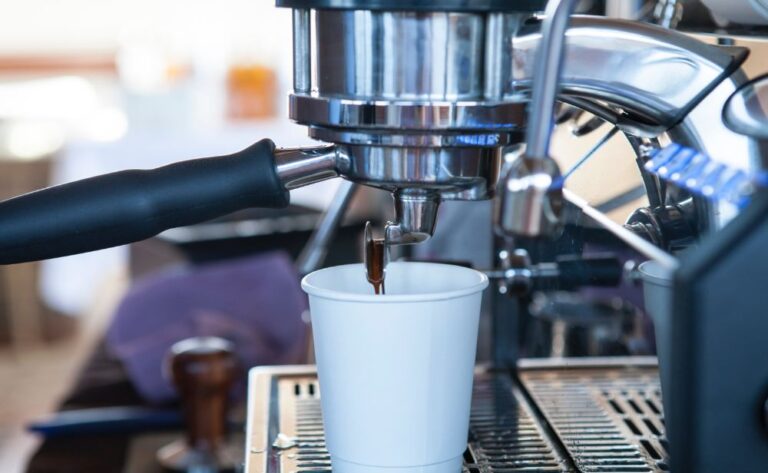
Within eight to twelve seconds, you should begin the process of extracting the espresso.
The frothing of milk
Want to create a latte or cappuccino?
After that, it’s time to put that milk frother to good use.
Use full milk while making a latte since it produces a microfoam that is more dense.
When preparing a cappuccino, using skim milk will result in a layer that is more densely foamed.
Now, before you use the frothing wand, you need to make sure that it has been thoroughly cleaned. In point of fact, you need to be sure you’ve done that each time you intend to use it. To accomplish this, first place the wand into the container you will be using, and then turn the dial until it is in the steam position.
After around fifteen seconds, water should begin dripping out of the wand, at which point it should turn into steam. After a few seconds, return the dial to the standby position by turning it back clockwise.
Now it’s time to begin the actual process of foaming.
Milk should be poured into the jug that comes with the machine. Keep one hand on the base of the milk jug while you hold it with the other and hold the handle in one hand.
Then, position the tip of the wand so that it is just slightly submerged below the surface of the milk. Make the whirlpool by giving the jug a very tiny tilt in the opposite direction of the current.
When will you know that the milk is ready to drink?
When the jug becomes too hot to touch, you will know it is time to cease foaming the milk. To halt the action, turn the dial all the way back to the standby position.
Expert Tips
The attention to detail that goes into making a decent espresso may make it into a terrific one. The following are some suggestions that can assist you in accomplishing that goal:
Be sure to preheat the machine before you begin brewing, even though technically your espresso machine will be ready to use after just a minute has passed. However, before beginning the brewing process, it is recommended that you wait fifteen minutes for it to reach the desired temperature. If you start the brewing process too soon, certain components of the machine may still be cold, which will result in the coffee being chilly as well.
Warm up your cup before pouring coffee into it; this will allow the coffee to maintain its temperature for a longer period of time.
Immediately after you are finished, pour some hot water through the steam wand to give it a fast washing. This will remove any milk residue that may have been left inside the steam wand. You must ensure that there is no growth of bacteria inside.
Make sure to use high-quality coffee, as if you do not, your espresso won’t turn out very well. To get the most out of the flavor of the coffee, you should use it as soon as it has been roasted.
How to Achieve Perfection in Your Cappuccino Making Using the Breville
There is no doubt that the Breville coffee maker is capable of producing an excellent cappuccino or latte. There are a few strategies that may be utilized there, and we are going to get more into those strategies in the following part.
Espresso of high quality is, without a doubt, essential to the making of a delicious latte.
You should grind your own coffee beans if you want the best flavor possible. If the Breville machine you own doesn’t come with a grinder already installed, you might want to look into purchasing a separate one.
When you go to buy the beans, make sure you pay attention to the date that says “roasted on” on the box. You should select a bag that was roasted anywhere between two and ten days ago.
Additionally, the type of water that is utilized in the Breville machine is an important consideration. It is highly recommended that you filter the water you use in your coffee so that it does not acquire an unusual flavor.
Now, finding the appropriate amount of microfoam is essential to creating the perfect latte. Whole milk is the best option for this particular purpose. It has the ideal quantity of fat to produce a velvety, creamy texture, which is what gives the latte its distinctively luxurious flavor. Tap the jug on the counter to eliminate any large bubbles that may have formed.
Last but not least, latte art is essential to the latte experience.
To accomplish that, you will need to complete the following:
1. Use your dominant hand to hold the jug, and use your non-dominant hand to carry the espresso cup.
2. Position the espresso cup so that it is angled toward the jug at a 20-degree angle.
3. Pour the milk in a steady stream until it reaches the halfway point. You don’t want to go too quickly, because that could end up ruining the crema.
4. When the espresso cup is two-thirds full, turn it around so that it is standing upright again. Move the pitcher so that it is directly above the cup while you are doing that. At this stage, you should see the first signs of microfoam developing on the surface.
5. To produce latte art, swirl the jug in a variety of various directions.
You now know the answer! It takes some practice to become proficient, but there is nothing that cannot be conquered after a few attempts.
FAQ
Do you have any additional queries regarding Breville?
Let’s respond to them in the next part.
How do you use the cleaning tablets for the Breville espresso machine?
Place the cleaning disk inside the filter for the one cup, and then place the pill in the middle of the disk. After you have positioned the portafilter appropriately, push the power button as well as the 1-Cup and 2-Cup buttons simultaneously. The indicator light will begin flashing to show that the cleaning cycle has begun.
Why does the espresso from my Breville taste so bitter?
It’s likely that your coffee is ground too finely, which results in excessive extraction. When making espresso, you want the ground coffee to be of a medium-fine texture.
In the Breville espresso machine, is it possible to use coffee that has already been ground?
Yes, you can. In point of fact, several Breville models enable you to avoid the bean hopper altogether by employing a separate chamber for the use of pre-ground coffee. You won’t have to keep going back and changing the grounds on the inside of your machine if you do it this way.
A Few Parting Thoughts
You should now have everything at your disposal to successfully use the Breville espresso machine.
The operation of Breville machines is rather uncomplicated and uncomplicated. And if you follow our advice, there is very little chance that you will make a mistake.
